Simple Drift Tier Lists
Rank cars by drift feel, cash farm value, and beginner friendliness — not hype alone.
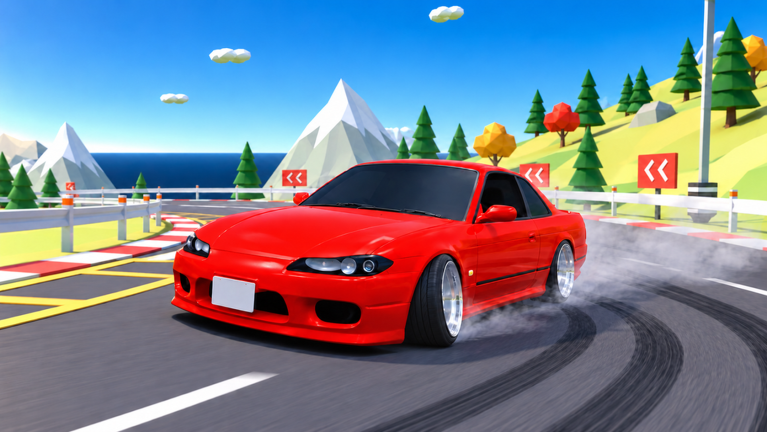
Simple Drift already ships 45+ real-inspired cars spanning Japan, Europe, and the US, plus deep cosmetic and stance options. A single “best car” list fails because the right pick depends on whether you are learning e-brake entries, farming judged cash, or chasing leaderboard angle on touge. This hub explains the ranking lenses we use and points you to the detailed Cars Tier List.
Meta shifts when Third Floor patches power curves, map collisions, or reward weights. Treat every tier as a snapshot, then confirm feel in your own garage after reading Car Tuning.
Ranking lenses (use the right one)
Drift feel (style & control)
How willingly the car rotates, holds a long slide, and answers steering angle / e-brake inputs. Ideal for night touge, forest road, and clip-heavy judged lines.
- S — Predictable breakaway, strong mid-drift adjustability, rewards good 2-step timing
- A — Excellent with mild tune work; slightly narrower sweet spot
- B — Fun but needs more correction or specific maps
- C — Grip-biased or twitchy without heavy investment
Cash farm (efficiency)
How quickly the car helps you finish dailies, judged runs, and clean linked drifts without constant resets. Stability matters more than peak horsepower.
- S — Easy to keep moving, rarely spins into walls, strong for repeated runs
- A — Fast enough with acceptable crash rate
- B — High ceiling but punishing mistakes cost time
- C — Too fragile or too slow for efficient loops
Beginner (first 5–10 hours)
Forgiving throttle response, readable weight transfer, and low purchase / unlock friction. Includes free or early options such as the Third Floor 3000GT.
- S — Learn 2-step and e-brake without constant garage rebuilds
- A — Solid trainers with minor quirks
- B — Teachable but demanding
- C — Save these until your inputs are consistent
A car can be S for farm and only B for pure style, or the reverse. Always check which column a community post used before you copy a garage.
Snapshot highlights
Exact ordering lives on Cars. Conceptually:
- Starter / early garage — whatever free or cheap chassis you unlock first; prioritize control over prestige.
- Mid garage — balanced JDM-inspired chassis that accept stance and steering angle upgrades cleanly.
- JDM drift icons — the cars players chase for touge authenticity and slide character.
- A31 Cefiro — highlighted among the real-inspired roster; strong identity car for players who want classic night-run vibes.
- Hypercar: Chiron — headline power and presence; fantastic when tuned carefully, punishing if you only buy it for the name.
- Group reward: 3000GT — free for Third Floor members with ongoing +15% cash. Often the best “tier per effort” pick on day one.
Full commentary, caveats, and map pairings are on the cars page.
How tuning changes tiers
Raw chassis tier is only half the story. Simple Drift lets you tune power, turbo, gearing, steering angle, and stance, then dress the car with 60+ body kits, wraps, underglow, air ride, window tint, and drift strobes. Cosmetics do not equal grip, but stance and steering angle absolutely change drift feel.
Rules of thumb before you rerank a car in your head:
- Raise steering angle for tighter initiations on touge hairpins.
- Soften or adjust stance for stability on docks and speed strip.
- Gear for the map — short gears help technical forest sections; taller gears help raceway and Bikernieki straights.
- Do not max power first if you still miss Q 2-step timing; see Controls.
Deep dive: Car Tuning.
Map context matters
An S-tier touge weapon can feel average on a wide circuit. Pair cars with the right environment from the Maps guide:
- Touge / night touge / forest road — rotation and angle
- Docks / night city — rhythm and hazard awareness
- Circuit / raceway / Bikernieki — speed management and linking
- Speed strip — launch, turbo response, straight-line stability
Judged runs and tandem ghosts reward clean lines more than peak stats. Leaderboard chasers should pick the lens that matches the board they care about.
How to use this hub
- Pick your goal: learn, farm, or style.
- Open Cars Tier List and read that column.
- Confirm you claimed codes and Third Floor perks so you can afford the pick.
- Apply a first tune pass, then test on two different maps.
- Revisit after patches listed on Updates.
Related pages
- Cars Tier List — detailed conceptual rankings
- Car Tuning — make mid-tier cars punch up
- Earn Cash — fund the next garage slot
- Getting Started — unlock order for new players
- Players — community meta talk and tandem etiquette
Rank smart, tune honestly, and let the slide decide.
Frequently Asked Questions
Quick answers to the most common questions.
What does S / A / B / C mean in Simple Drift?
They are relative grades for a specific lens — drift feel, cash farm, or beginner friendliness — not a single universal score.
Is the Chiron always the best car?
No. It is a headline hypercar with huge power, but beginners and farm runs often prefer more rotatable mid cars or the free 3000GT.
Does the free 3000GT rank well?
For beginners and early cash farm, yes — especially with the Third Floor +15% cash bonus that comes with membership.
Will this tier list stay frozen?
No. Patches can move cars. Re-check after updates and validate with your own tunes.
Where should I go next after picking a car?
Read Car Tuning, then practice on a suitable map from the Maps guide before chasing leaderboards.